Quick and Easy Front Door Update
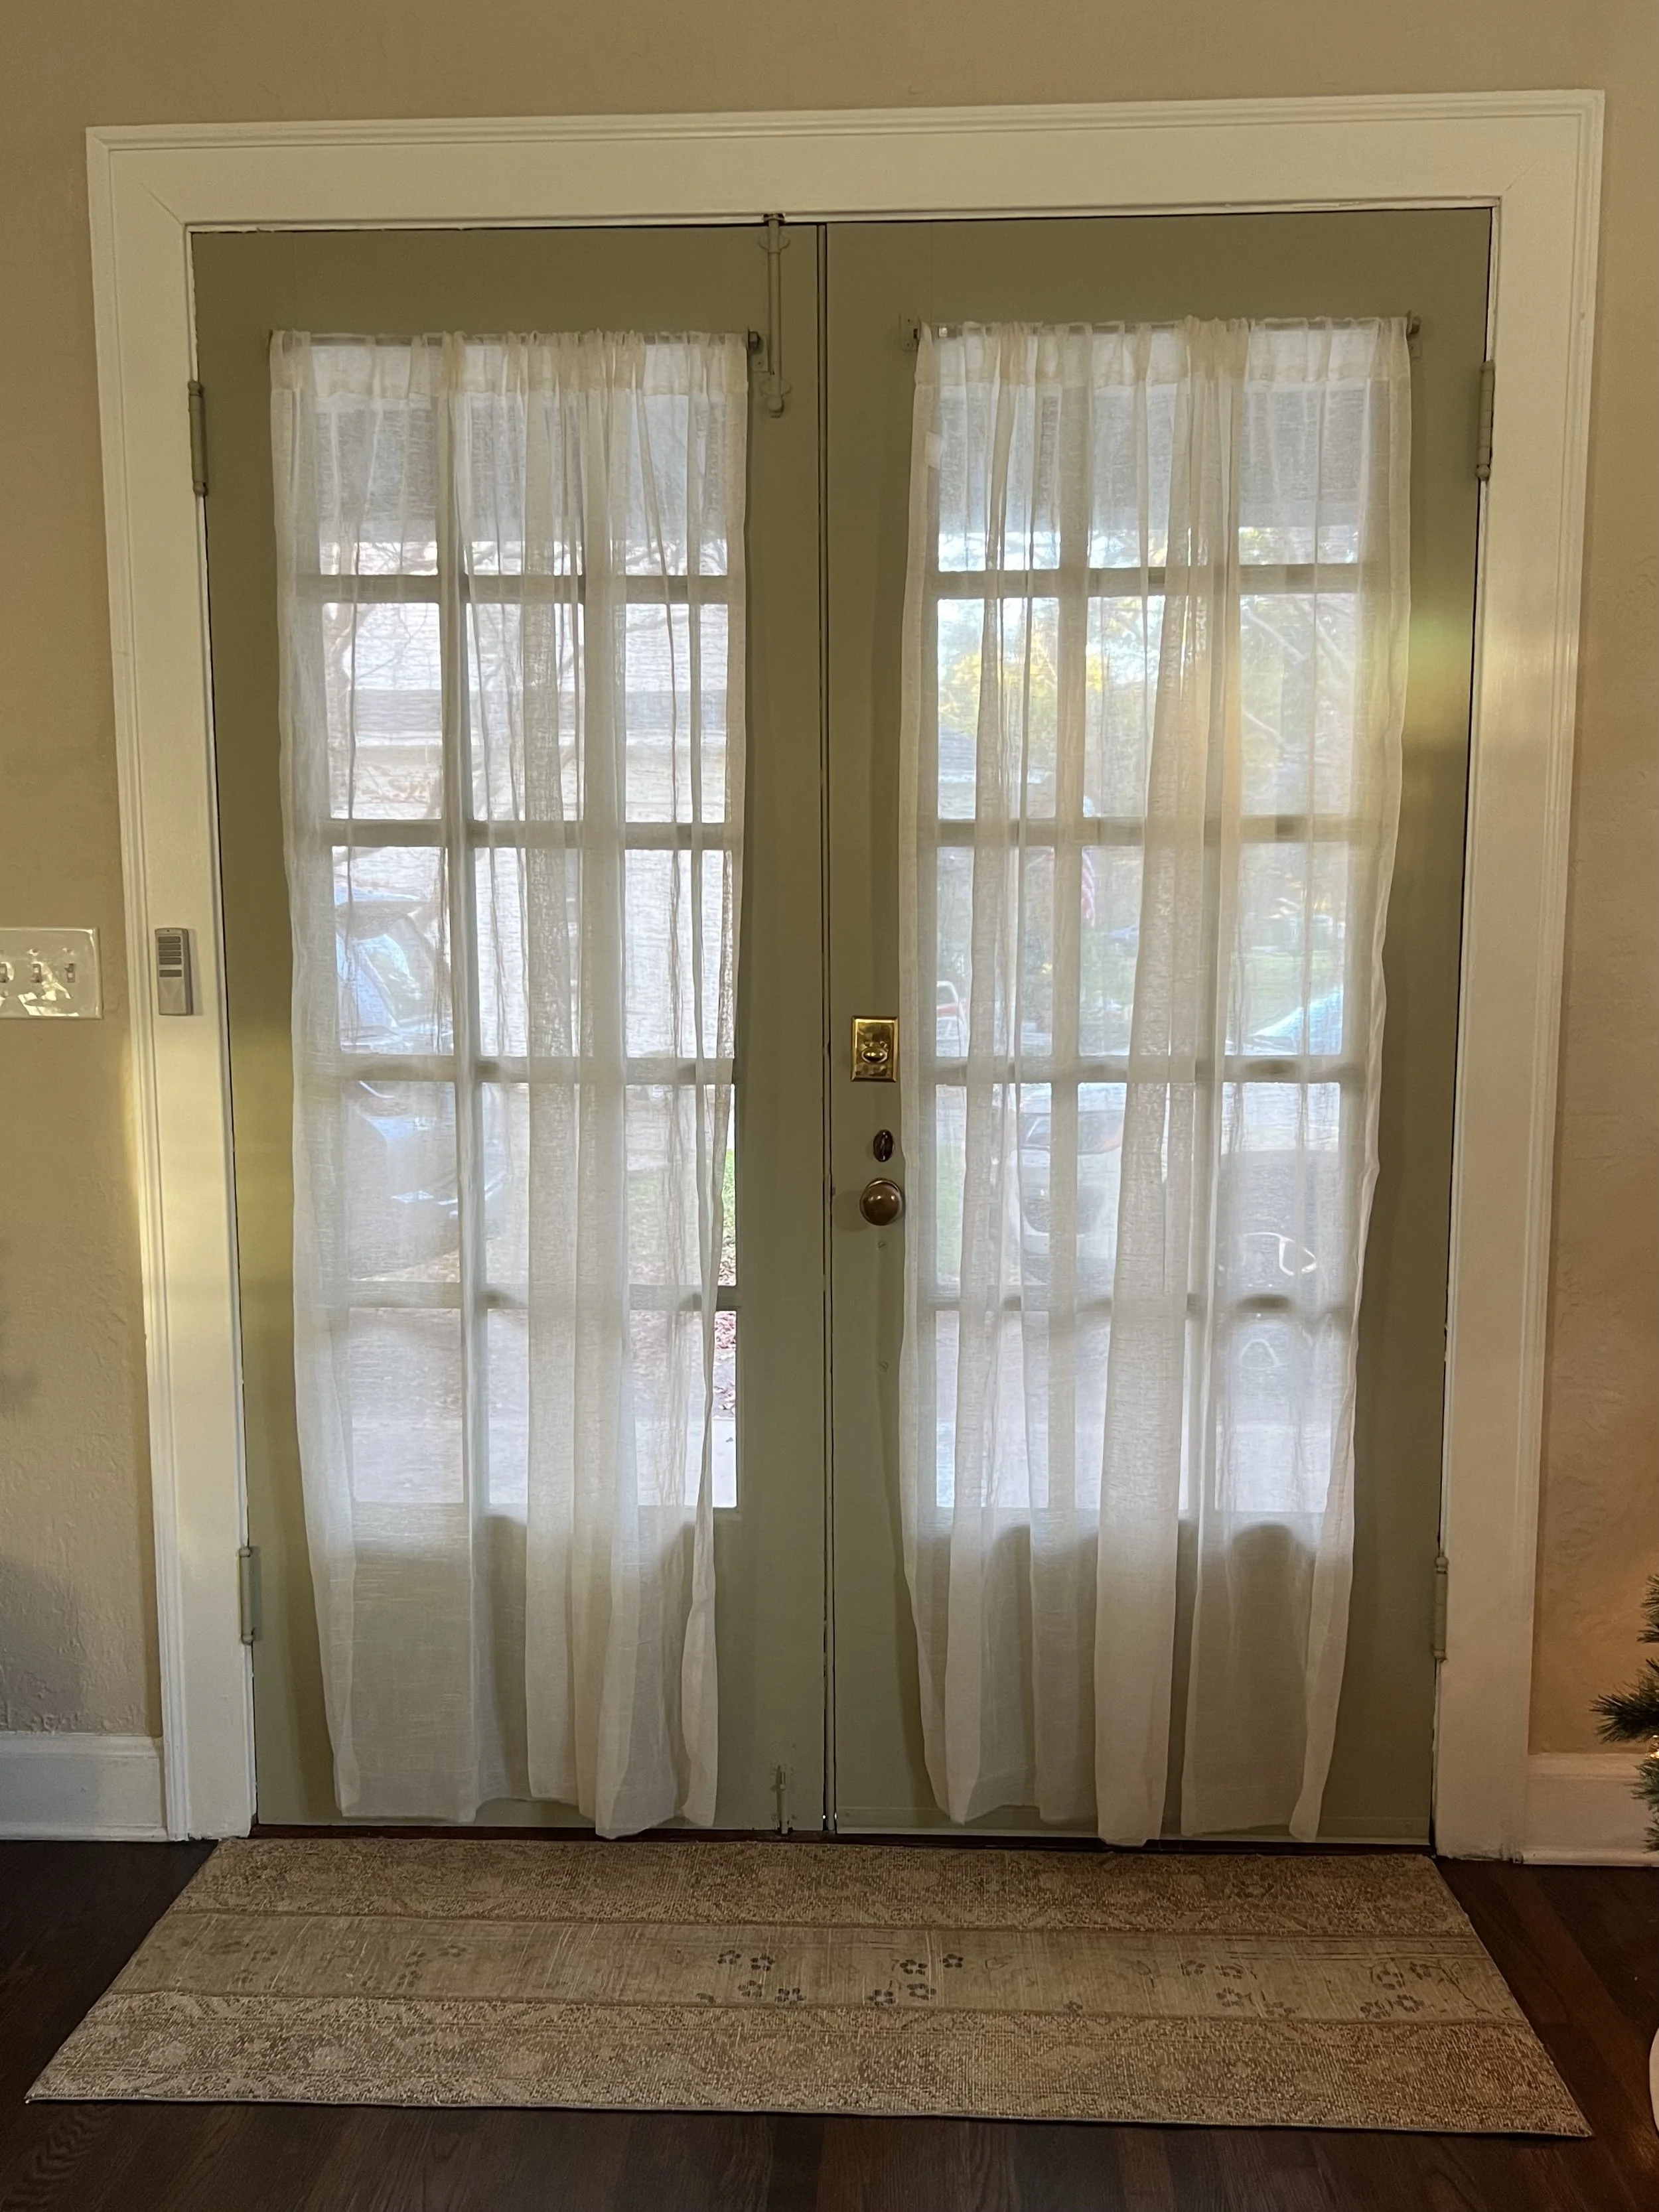
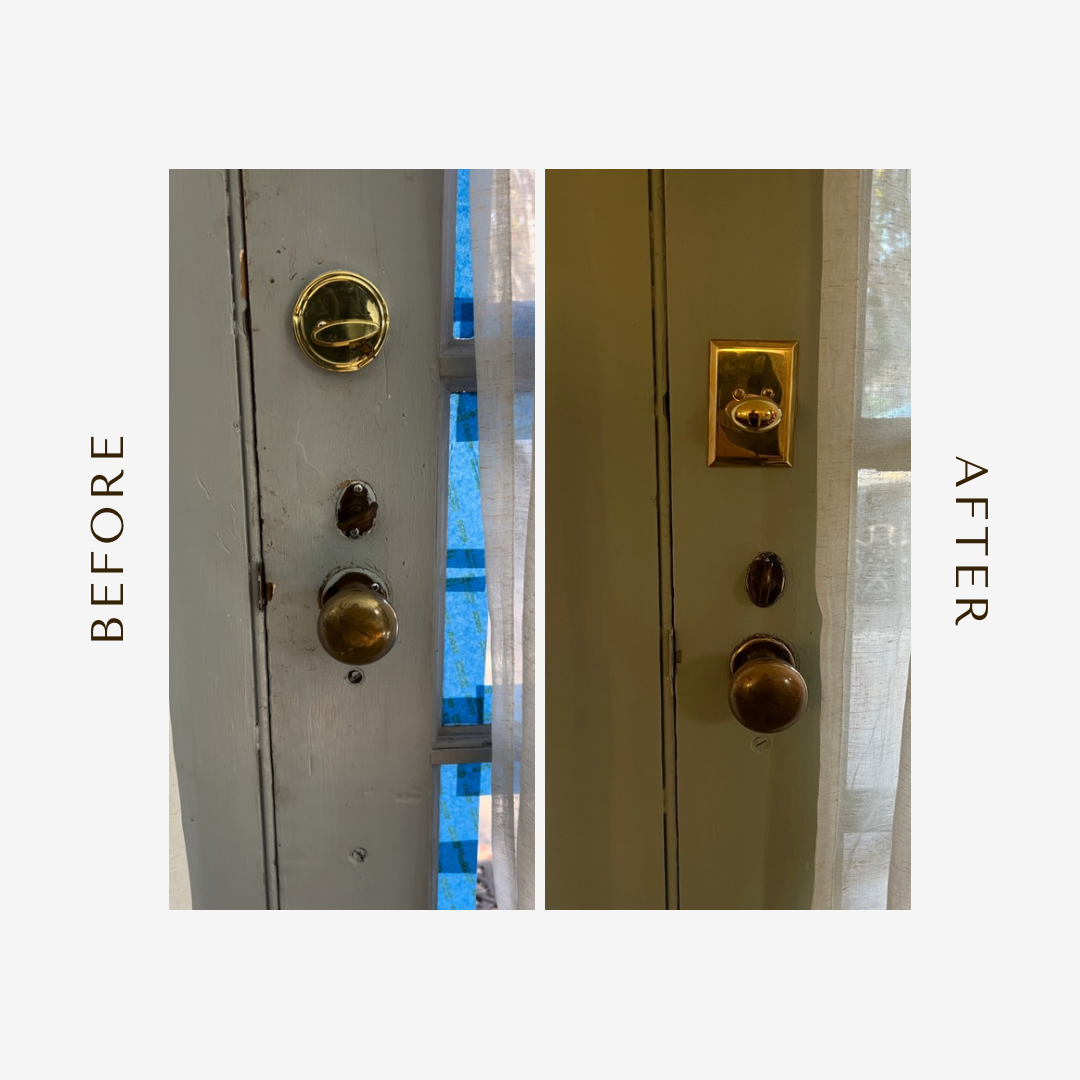
Updating a front door with some paint and hardware may seem intimidating if you haven’t taken on a project like it before, but it’s very simple and can easily be completed within a day! I already completed a decent sized paint job on my fireplace (see my previous blog post), but my living room painting saga just wouldn’t be complete until I completely de-blued it. In order to do so, I had to paint the front doors. Yes, I typed that correctly, doors. I have a front door, and two side doors and all three doors were painted the same blue as the fireplace when we moved in. So in order to give them an update to better match the rest of our home, I decided to paint them a beautiful shade of green called French Gray by Farrow & Ball. I also wanted to compliment the original (almost) 100-year-old brass knobs that have a beautiful patina on them by sourcing some unlaquered brass locks and hinges that will slowly patina over time and match the knobs. These were found at Nostalgic Warehouse and Grandeur Hardware. Let’s take a look at what I was working with.


They’re not too pretty to look at, but the front door, at least, has some unique character that was trying to find a way out! Like always, let’s break this project into steps.
Step One: Sanding
Before I paint over something, I always like to sand it first to scuff it up and make the surface easier for paint to adhere to. So that’s what I did, Unfortunately, at this point I still didn’t have a power sander so I had to sand it by hand again. I definitely recommend safety glasses (uh oh, looks like I forgot to put them on here-whoops) and a mask to keep the dust from getting into your eyes, nose and mouth.

This step is never fun, but it really is necessary. After I sanded, I cleaned up the dust, removed some of the hardware, and taped where I didn’t want to paint.
Step Two: Paint
I cannot speak highly enough about Farrow & Ball’s paint. It went on like a dream! I was so surprised by the amount of coverage each dip in paint was giving me, that I decided it didn’t even need a second coat!! I know that that is never recommended, and maybe it was because of how the blue was blending with the green, but it just looked so lovely with the first coat that I really didn’t think it needed anymore.
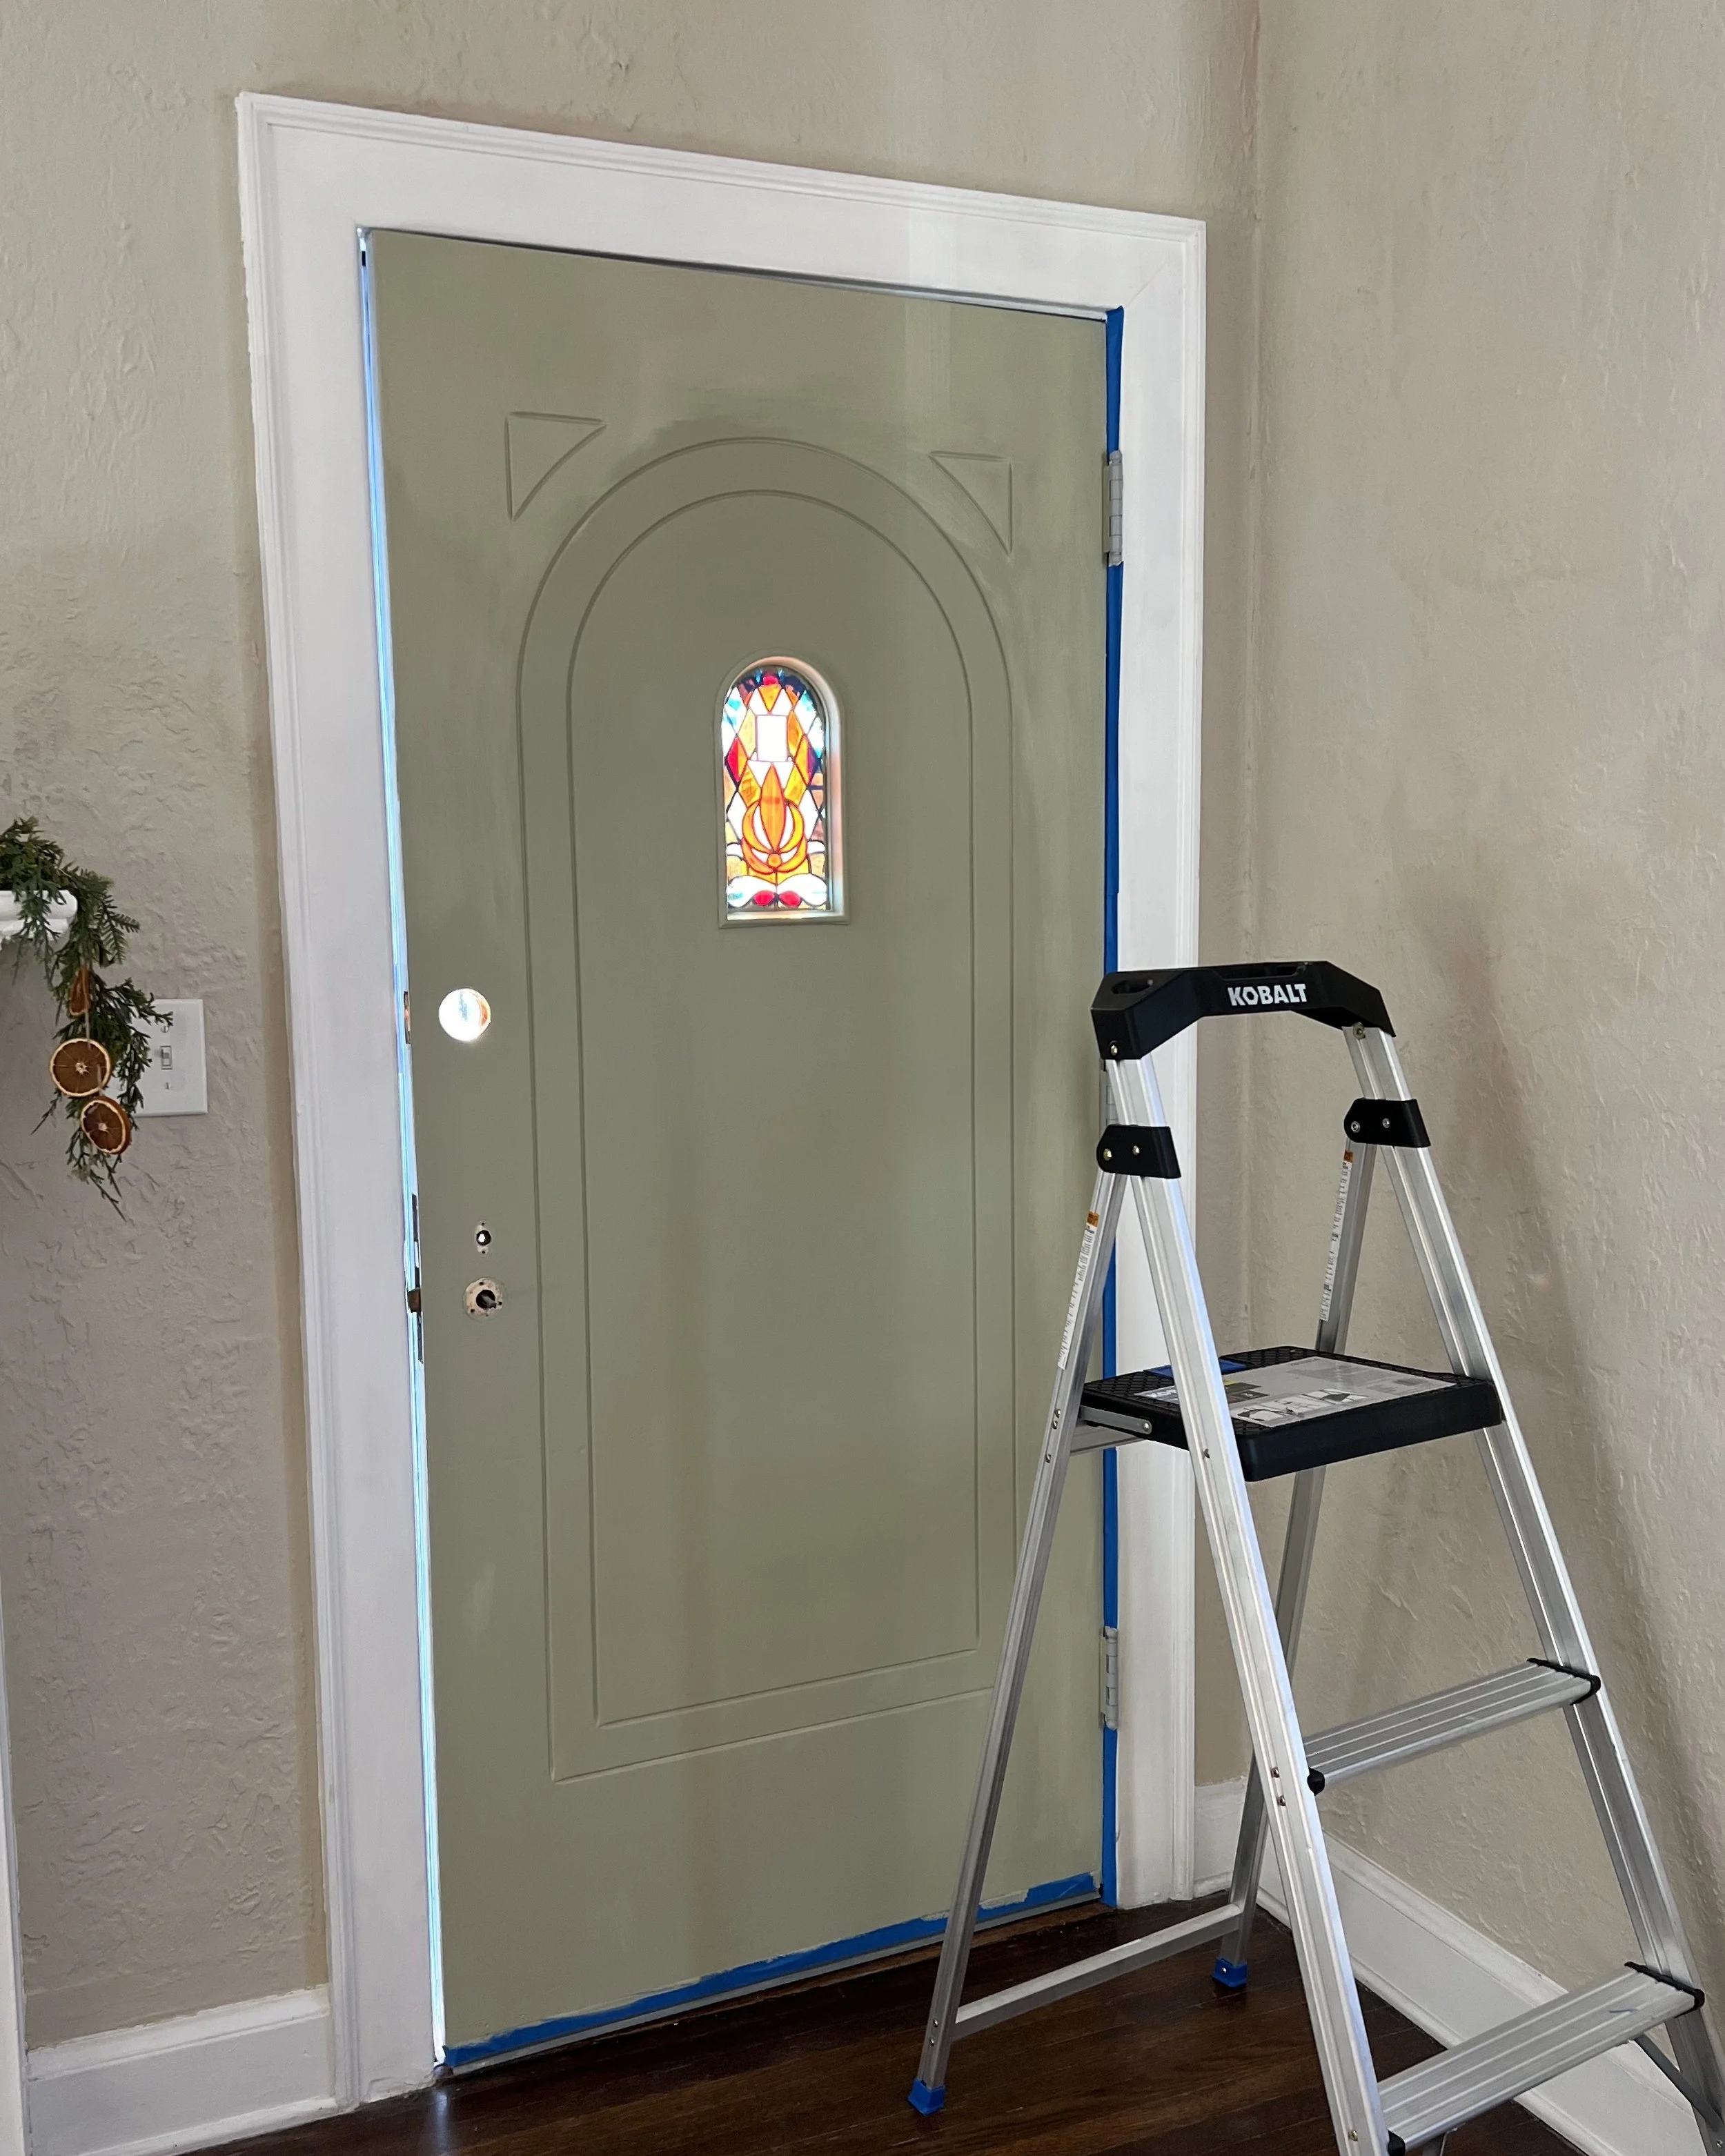
Here is how the door was looking while the paint dried.
Step Three: Hardware
After the paint was all dry and the tape was removed, I was ready to install the new hardware! Instead of taking the door off of its old hinges, I decided to replace each one with the new hinge one by one so the door could remain connected. I did not, however, update the hinges on the French Doors, because we eventually want to get them replaced.
That’s really all there was to it! Probably my easiest little home update so far! If you’d like to watch a transformation video of the process you can watch it here.